Table of Contents
Have you ever seen a software application and said, “Hey, I wanna build that!” but had no idea where to start?
If so, you’ve come to the right place. Today I’m showing you how to create a software application using a five-step process.
After reading this guide you’ll be able to get started with your own projects, from trivial hello, world apps to massive programs used in enterprise software.
But first, tell me if this situation sounds familiar:
You’re exploring Traversy Media videos on YouTube and see one of his cool projects. You follow the tutorial step-by-step and soon have a seemingly portfolio-worthy code base. Right on! Problem is, 100,000 other people have freshly pushed that same exact project to GitHub. Argh!
When you’ve reached the point in your developer journey when you’re ready to develop your own projects, what do you do? How do you start? Rip open a code editor and hope for the best?

Experimentation is fun and can lead to some great ideas, but not testing the feasibility of your technical ideas will lead to a lot of wasted time in front of a computer screen. Why put that strain on your eyes, even in dark mode?
Instead, read this five-step guide to planning a dev project and you’ll be well on your way to better results you can not only show off proudly in your portfolio, but also take full credit for as the creator. This is a skill you can not only bring to your “nine to five” software developer job, but also apply to your freelance projects.
Disclosure: I’m an affiliate of SaasDesign.io, Namecheap and Cloudways and may get a few bucks if you buy something).
How to Create a Software Project in 5 Steps
Step 1: Brainstorm
The first step in any creative project is developing an idea. Whether screenwriting, songwriting, fine art, or software development, the idea is the hub of your creation. The planning process starts with brainstorming for projects while noting features as they bubble up in your brain.
Don’t be afraid of “weird” ideas and be sure to write everything down.
Step 2: Practicality Check
Now that you have a few pages of compelling ideas, it’s time for a practicality check.

Does your current skillset seem to match with your project idea? In other words, can you pull this project off? Consider the relevance of the project from a technical (and maybe even social) standpoint.
For example, maybe you have the technical skills to build a dating app for hyenas using Pascal and NoSQL, but is it actually solving a problem, does it make a process more efficient for either computers or humans who work on those computers? If not, you may need to reconsider your approach.
Step 3: Blueprint
Part three is the real fun part: getting down ‘n dirty with blueprinting. Whether you’re working on a backend, front-end, or full-stack project, you need to blueprint your project or else risk coding yourself into a corner. Believe me, coding corners are very hard to escape! Most times it happens when a dev doesn’t spend enough time on the blueprinting process (or skips it all together).
Said simply, blueprinting means designing your application. For example, what features will the project have; what languages, frameworks, and libraries will you use; how will it all fit together?

Further, will your project be based on functional programming, OOP, or something else? Be honest in quizzing yourself and analyzing technical details: now’s the time to work out the snarls.
I’ve used UML for architecting a few of my OOP projects (it’s helped immensely), but if you don’t know UML you can also build normal flowcharts and diagrams.
Blueprinting can also consist of prototyping, wireframing, or creating a mockup using tools ranging from pen and paper to tools like Sketch and Adobe XD. Check out my video on the difference between these three design methods here:
You can also use pseudocode and CSS for front-end design blueprinting. It all depends on what keeps you comfortable and motivated, and what makes most logical sense for the project. (For example, you probably won’t be using much [if any] CSS for a backend project, even in the blueprinting stage.)
Remember, you don’t have to create everything from scratch. There’s an old saying that goes “work smarter, not harder.” Before you get to blueprinting, check if there are templates, boilerplate code, or any other “starter pack” materials that can help you blueprint more efficiently.
For example, Figma (a popular prototyping tool) has all sorts of third-party templates built for it. This Figma Wireframe UI Kit not only looks spiffy, but is going to save you a TON of time. If you’re a Sketch user and need to build a dashboard, check out the Dashboard UI Kit for Sketch.
Step 4: Step back
Everything so far has been micro-level focused on features and tasks. At this point, you’ve been fleshing out the details of your project, while spending many hours brainstorming, architecting, modeling, and repeating specific processes over …and over…and over again.
While it’s easy to get lost in the details and overlook critical details of the project at large, take some time to clear your head, take a few steps back, and absorb everything you’ve developed so far.
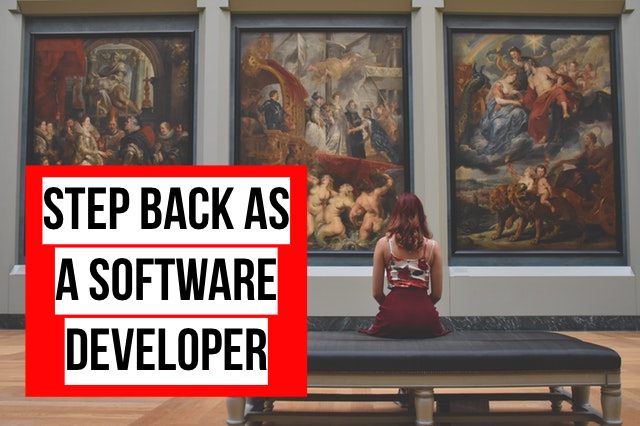
Maybe you started out with the software equivalent of a Monet painting when first planning your project, but now 20 feet away it’s suddenly looking like a junior high art class gone wrong.
Issues like these are a natural part of the creative process, so try not to panic.
And honestly, if you step back for the first time and see zero issues with your project, it warrants a more critical look — there’s always something that can be improved.
Write down the issues you encounter and untangle them before proceeding to the fifth and final step.
Step 5: Coding
Finally, it’s time to get started with coding the project… For real this time! Because you’ve carefully executed the previous steps, you might find this step the most drama-free of them all.

Of course, you’ll still have to engage in the typical dev process of typing, testing, troubleshooting, locating that silly and sadly simple misspelling that made your program crash for six hours…But that’s why we’re programmers, no? 🤪
The bonus step in this process is to share it with planet Earth using something like a VPS or cloud service.
How to create a software application five-step summary:
- Brainstorm
- Do a practicality check
- Blueprint
- Step back to analyze the big picture
- Code out your project
This process might sound like a big time investment. And true enough, it does take time and energy. You may even find yourself rewinding a few times and going a step or two when issues arise.
But, compared to coding yourself into a corner (or worse, losing interest and quitting because you’re stuck), this five-step process is a huge time AND sanity saver.
Personally, I’ve lost so many projects because of my lack of planning. I either got frustrated and quit, or I simply ran my code into a deep, desolate corner through spaghetti code, or opted for a number of other shortcuts that led to programming dead-ends.
Follow these steps for planning a software development project and you will see an improvement in the quality of your projects!
Once you learn how to create a software application, your workflow is going to be smoother, more efficient, and just generally more enjoyable. Just less stress all around!
You can also watch the video version of how to create a software application step by step here (be sure to subscribe to my channel!):
How do I create a software application?
Start with the five-step process of brainstorming, do a practicality check, blueprint, step back to analyze the big picture, and finally code out your project.
What is the difference between wireframes vs mockups vs prototypes?
Essentially, prototypes are dynamic (i.e. include interactivity) whereas wireframes and mockups are not.
A wireframe is the most basic of the three. It is essentially a sketched-out idea of your application. You can use a variety of tools to build your wireframe, from good ol’ fashioned pencil and paper to something like Figma.
A mockup is in the middle of wireframe and prototype. It is more higher-fidelity than wireframes, but does not include the functionality of a prototype. An example of a mockup might be Photoshop documents portraying the look or user flow of a web application.
Finally, a prototype is the most advanced of the three. It includes functionality, if only basic, as well as a working interface. An example of a prototype in software is a website available locally for the client to test. The client may suggest only minor changes (colors, shapes) or major additions or edits to the functionality and interface.What is blueprinting in software development?
Blueprinting means designing your application. For example, what features the project will have; languages, frameworks, and libraries; along with answering the question of how it all fits together.